Motion Control

Practical walkthrough

How to use kling motion control for free, step by step

How to use kling motion control for free depends on whether you are testing an available workflow or preparing a repeatable production shot. Use this guide to choose the right path, check your inputs, and avoid wasting generations.

Review output before reuse
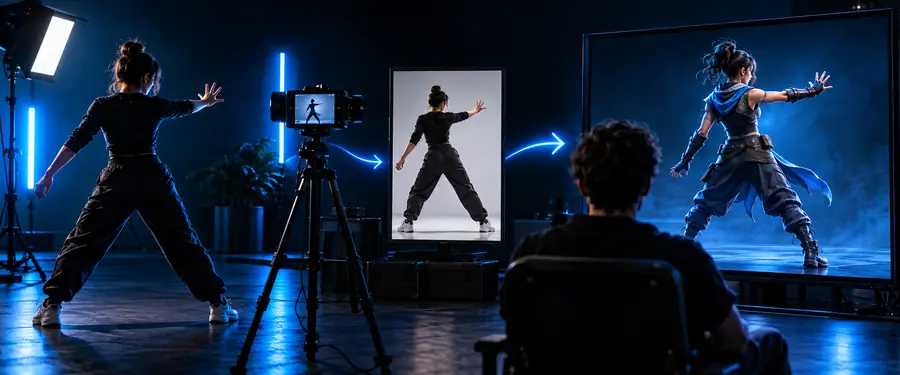
A practical Kling motion control workflow with a reference video and animated subject

Related guides

Decide which case you are

Start by identifying the job you are trying to complete. The best route for a quick experiment is not always the best route for a controlled shot.

Path A

Path A: test the motion quickly

Choose this path when you want to learn whether the movement reads correctly before refining the subject, camera, or final composition.

  1. 1

    Prepare a simple reference

    Choose a short, readable movement with one main subject. Avoid a crowded frame, rapid cuts, heavy occlusion, or a reference where the important gesture is hidden.

  2. 2

    Describe the intended result

    State what should move, what should remain stable, and what visual identity must be preserved. A focused instruction is easier to evaluate than a paragraph containing several unrelated changes.

  3. 3

    Inspect the first output

    Check pose timing, subject continuity, limb placement, framing, and background stability. If the motion is wrong, simplify the reference or instruction before adding more detail.

Path B

Path B: prepare a controlled shot

Choose this path when the result needs to fit a sequence, match a character direction, or survive closer review. More preparation does not guarantee a better result, but it makes failures easier to diagnose.

It cannot repair an unclear reference

If the subject is partly hidden, poorly lit, or moving too quickly to read, the system has less reliable visual information to follow.

Workaround

Use a cleaner clip with one visible subject and a distinct start-to-finish action.

It cannot guarantee exact identity

Motion transfer may preserve the general subject and action while changing small facial, clothing, hand, or body details between frames.

Workaround

Keep the prompt focused on motion and review several frames before treating the output as final.

It cannot replace shot design

A motion-control workflow does not automatically solve poor composition, inconsistent camera direction, weak lighting, or an unsuitable background.

Workaround

Plan the shot first and make the reference, subject, and intended framing agree.

It cannot promise unrestricted free use

Availability, limits, account requirements, model access, and output conditions can change outside this guide. A free test is not the same as unlimited production access.

Workaround

Check the current route and its terms before building a time-sensitive project around it.

Workflow choice

Final check: test route or controlled route

Use the comparison below before you begin. Neither route is universally better; the right choice depends on how much uncertainty you can tolerate in the first result.

Quick test
Controlled shot

Primary goal

Quick test

See whether the movement transfers at all

Controlled shot

Create a result that fits a planned sequence

Reference choice

Quick test

Short, clear, single-action clip

Controlled shot

Reference selected for framing, continuity, and shot intent

Prompt style

Quick test

One action and one preservation rule

Controlled shot

Action, subject direction, framing, and stability requirements

Iteration speed

Quick test

Prioritizes rapid feedback

Controlled shot

Prioritizes diagnosis between revisions

Tolerance for variation

Quick test

Higher; visual surprises are acceptable during testing

Controlled shot

Lower; continuity matters more than novelty

Best next step

Quick test

Simplify the reference if the movement fails

Controlled shot

Change one variable at a time and compare outputs

When to stop

Quick test

Stop once the motion idea is validated

Controlled shot

Stop when the result meets the shot's review criteria

Keep these numbers

A single visible subject makes the first motion test easier to read.
01 subject
Review both motion accuracy and subject continuity before refining style.
02 checks
Allow separate passes for reference clarity, instruction clarity, and final review.
03 passes
Inspect timing, pose, framing, and background stability in every useful output.
04 areas

Run a focused motion-control test

Start with a readable reference and one intended action, then judge the result before adding complexity. A disciplined first test gives you a better basis for deciding whether the workflow fits your project.

Start a motion test
  • Use one clear action
  • Review the first output critically
  • Change one variable per revision

Common questions

Tutorial FAQ

These answers address the practical question behind the search: how to test motion control without confusing a limited trial with a guaranteed free production workflow.

Begin with the currently available route, a short reference, and one clearly defined movement. Free access can have changing limits or requirements, so verify the active workflow before assuming that repeated production use is included.

Prepare a readable reference video, a visible main subject, and a short description of the movement you want to preserve. Also decide what must stay stable, such as identity, framing, or background, so you can evaluate the result consistently.

Common causes include an unclear reference, hidden body parts, rapid movement, competing subjects, or instructions that ask for too many changes at once. Try a simpler clip and change only one variable in the next test.

It may help you test an idea, but a free route should not be treated as a promise of unlimited generations, fixed output conditions, or commercial suitability. Review the current access terms and inspect continuity carefully before using an output in a finished project.

Start with the most important motion in the shot and keep the other elements stable where possible. Testing one dominant movement first makes it easier to tell whether a problem comes from the subject action, the camera direction, or the reference itself.

Start creating
Start creating